Controller
The Controller is a web application used to:
- manage queues
- configure services
- manage service desks
- advance tickets
It is accessible here.
Controller Access
On first access, the application requires the following credentials:
- Organization
- Password
You must use the same login credentials as Pharmadigital.
Once logged in, the Controller automatically retrieves from Pharmadigital all queues configured as Queue Management resources.
Controller Main Screen
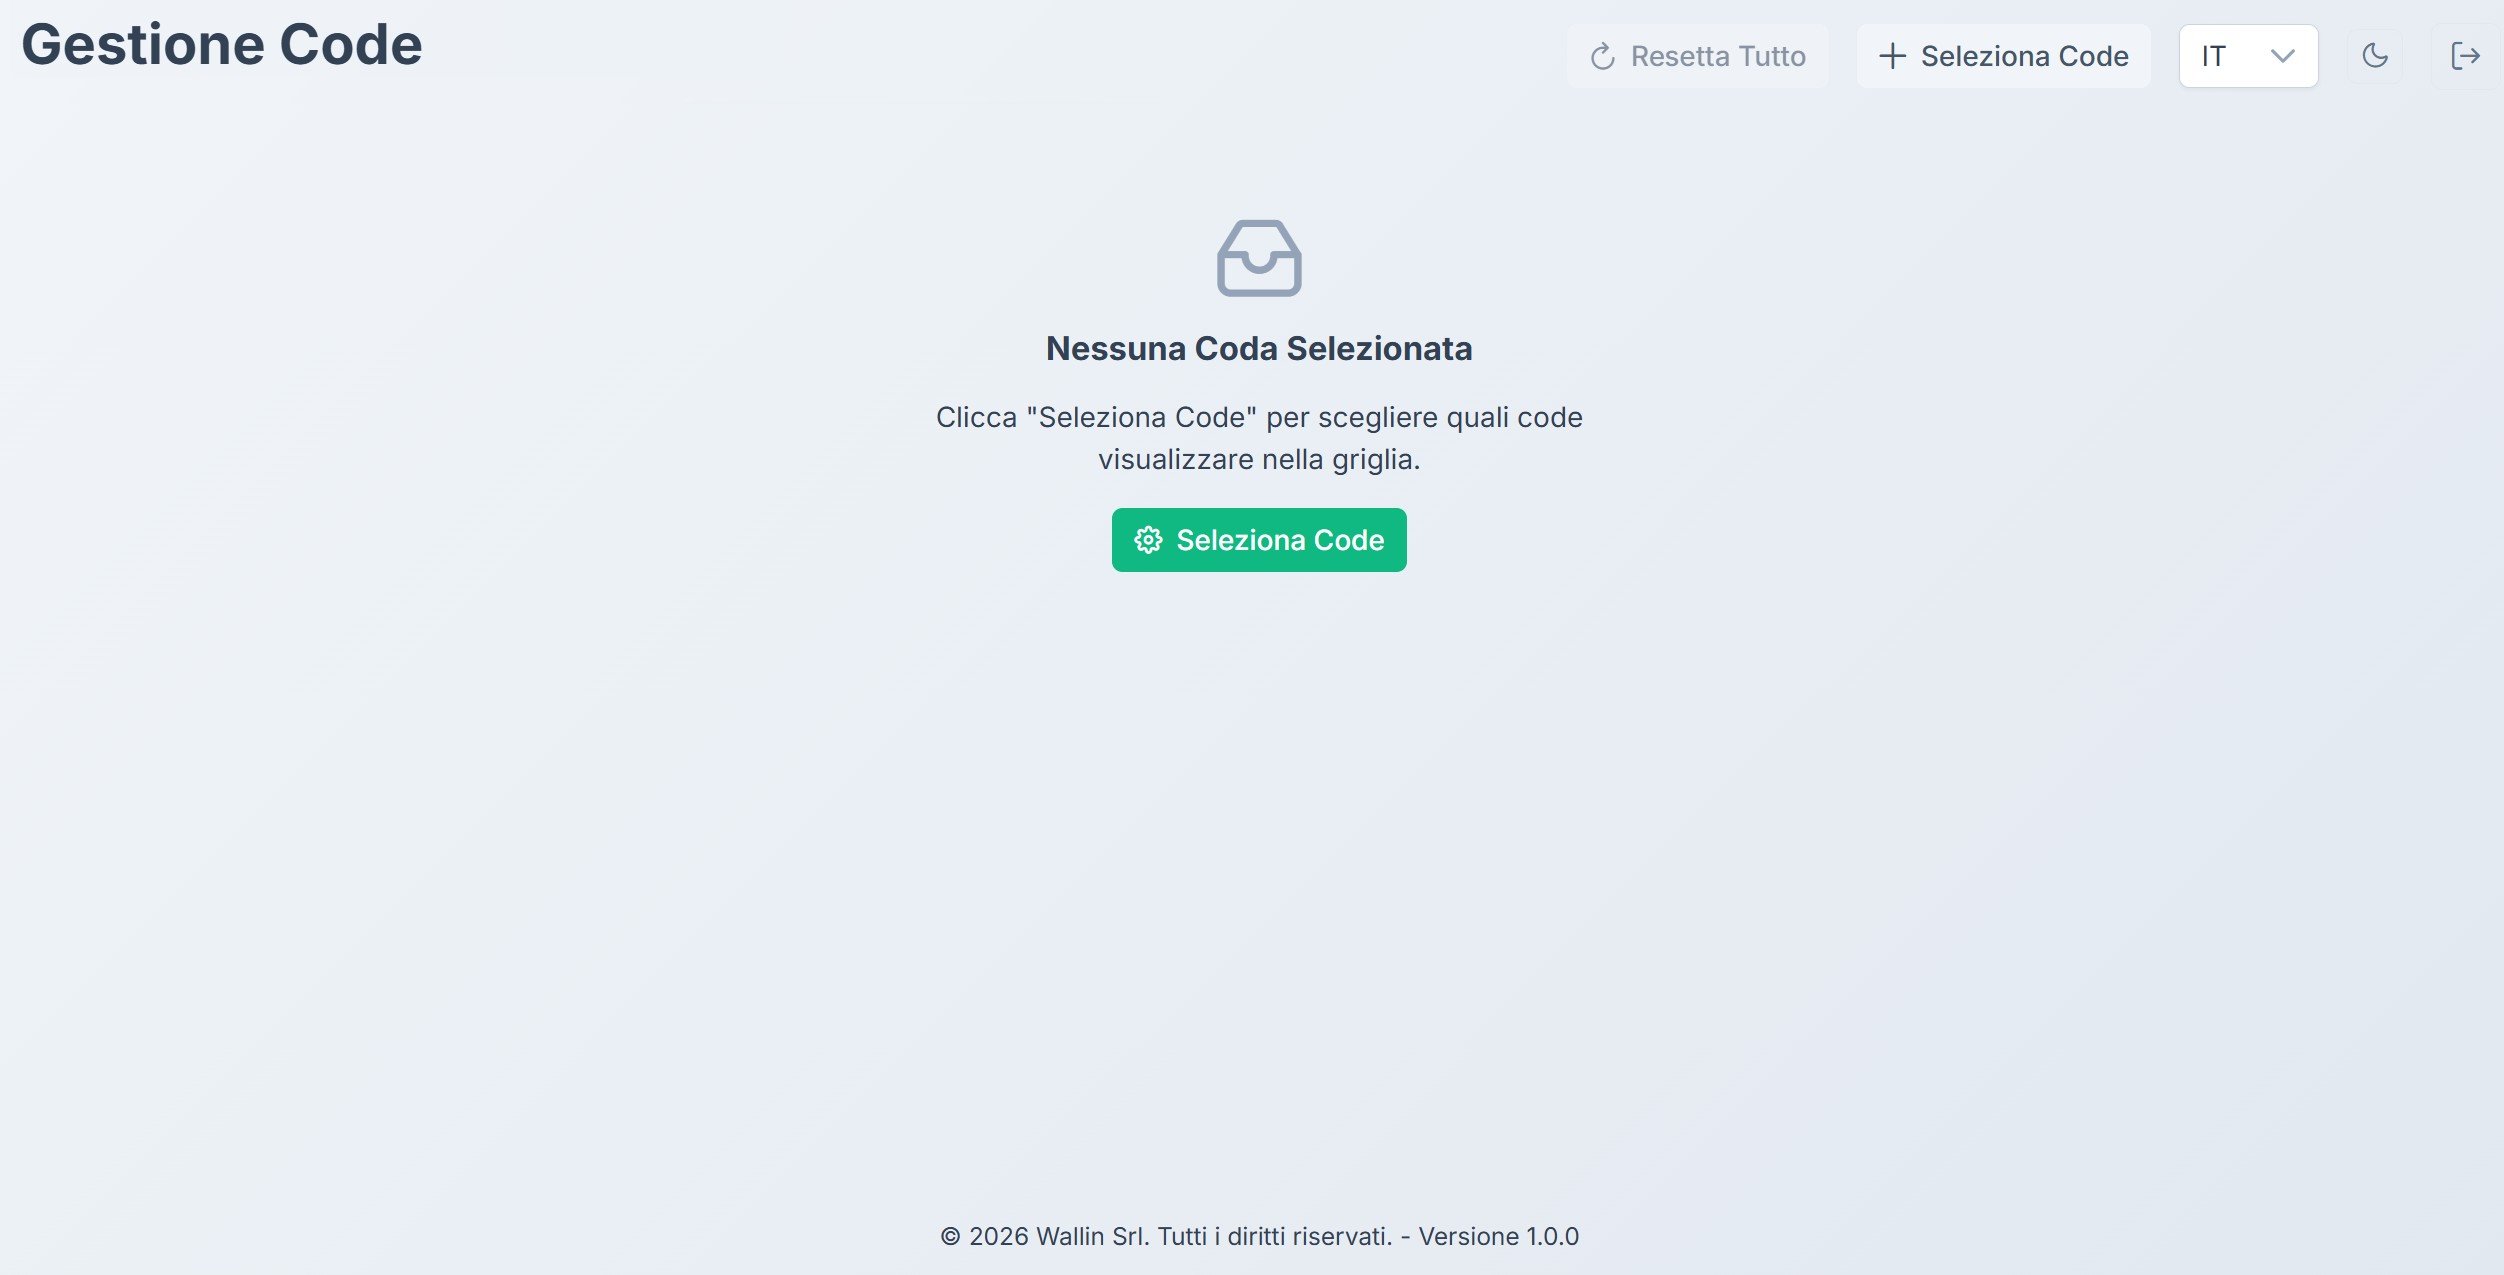
After logging in to the Controller, the main queue management screen is displayed.
If no queue has been selected yet, the system shows the message:
"No Queue Selected"
To start working, you need to select one or more queues to display.
Top Bar
The top part of the screen contains some main controls.
Select Queues
Allows you to choose which queues to display on the main screen.
Reset All
Resets the state of the displayed queues, clearing any temporary selections or configurations.
Language Selector
Allows you to change the interface language.
Settings
Provides access to the Controller settings.
Logout
Allows you to exit the application.
Queue Selection
To select the queues to manage:
- Press the Select Queues button
- Choose the queues you want to display
- Confirm the selection
The selected queues will be shown in the Controller's main grid, from which you can manage tickets and advance the queue.
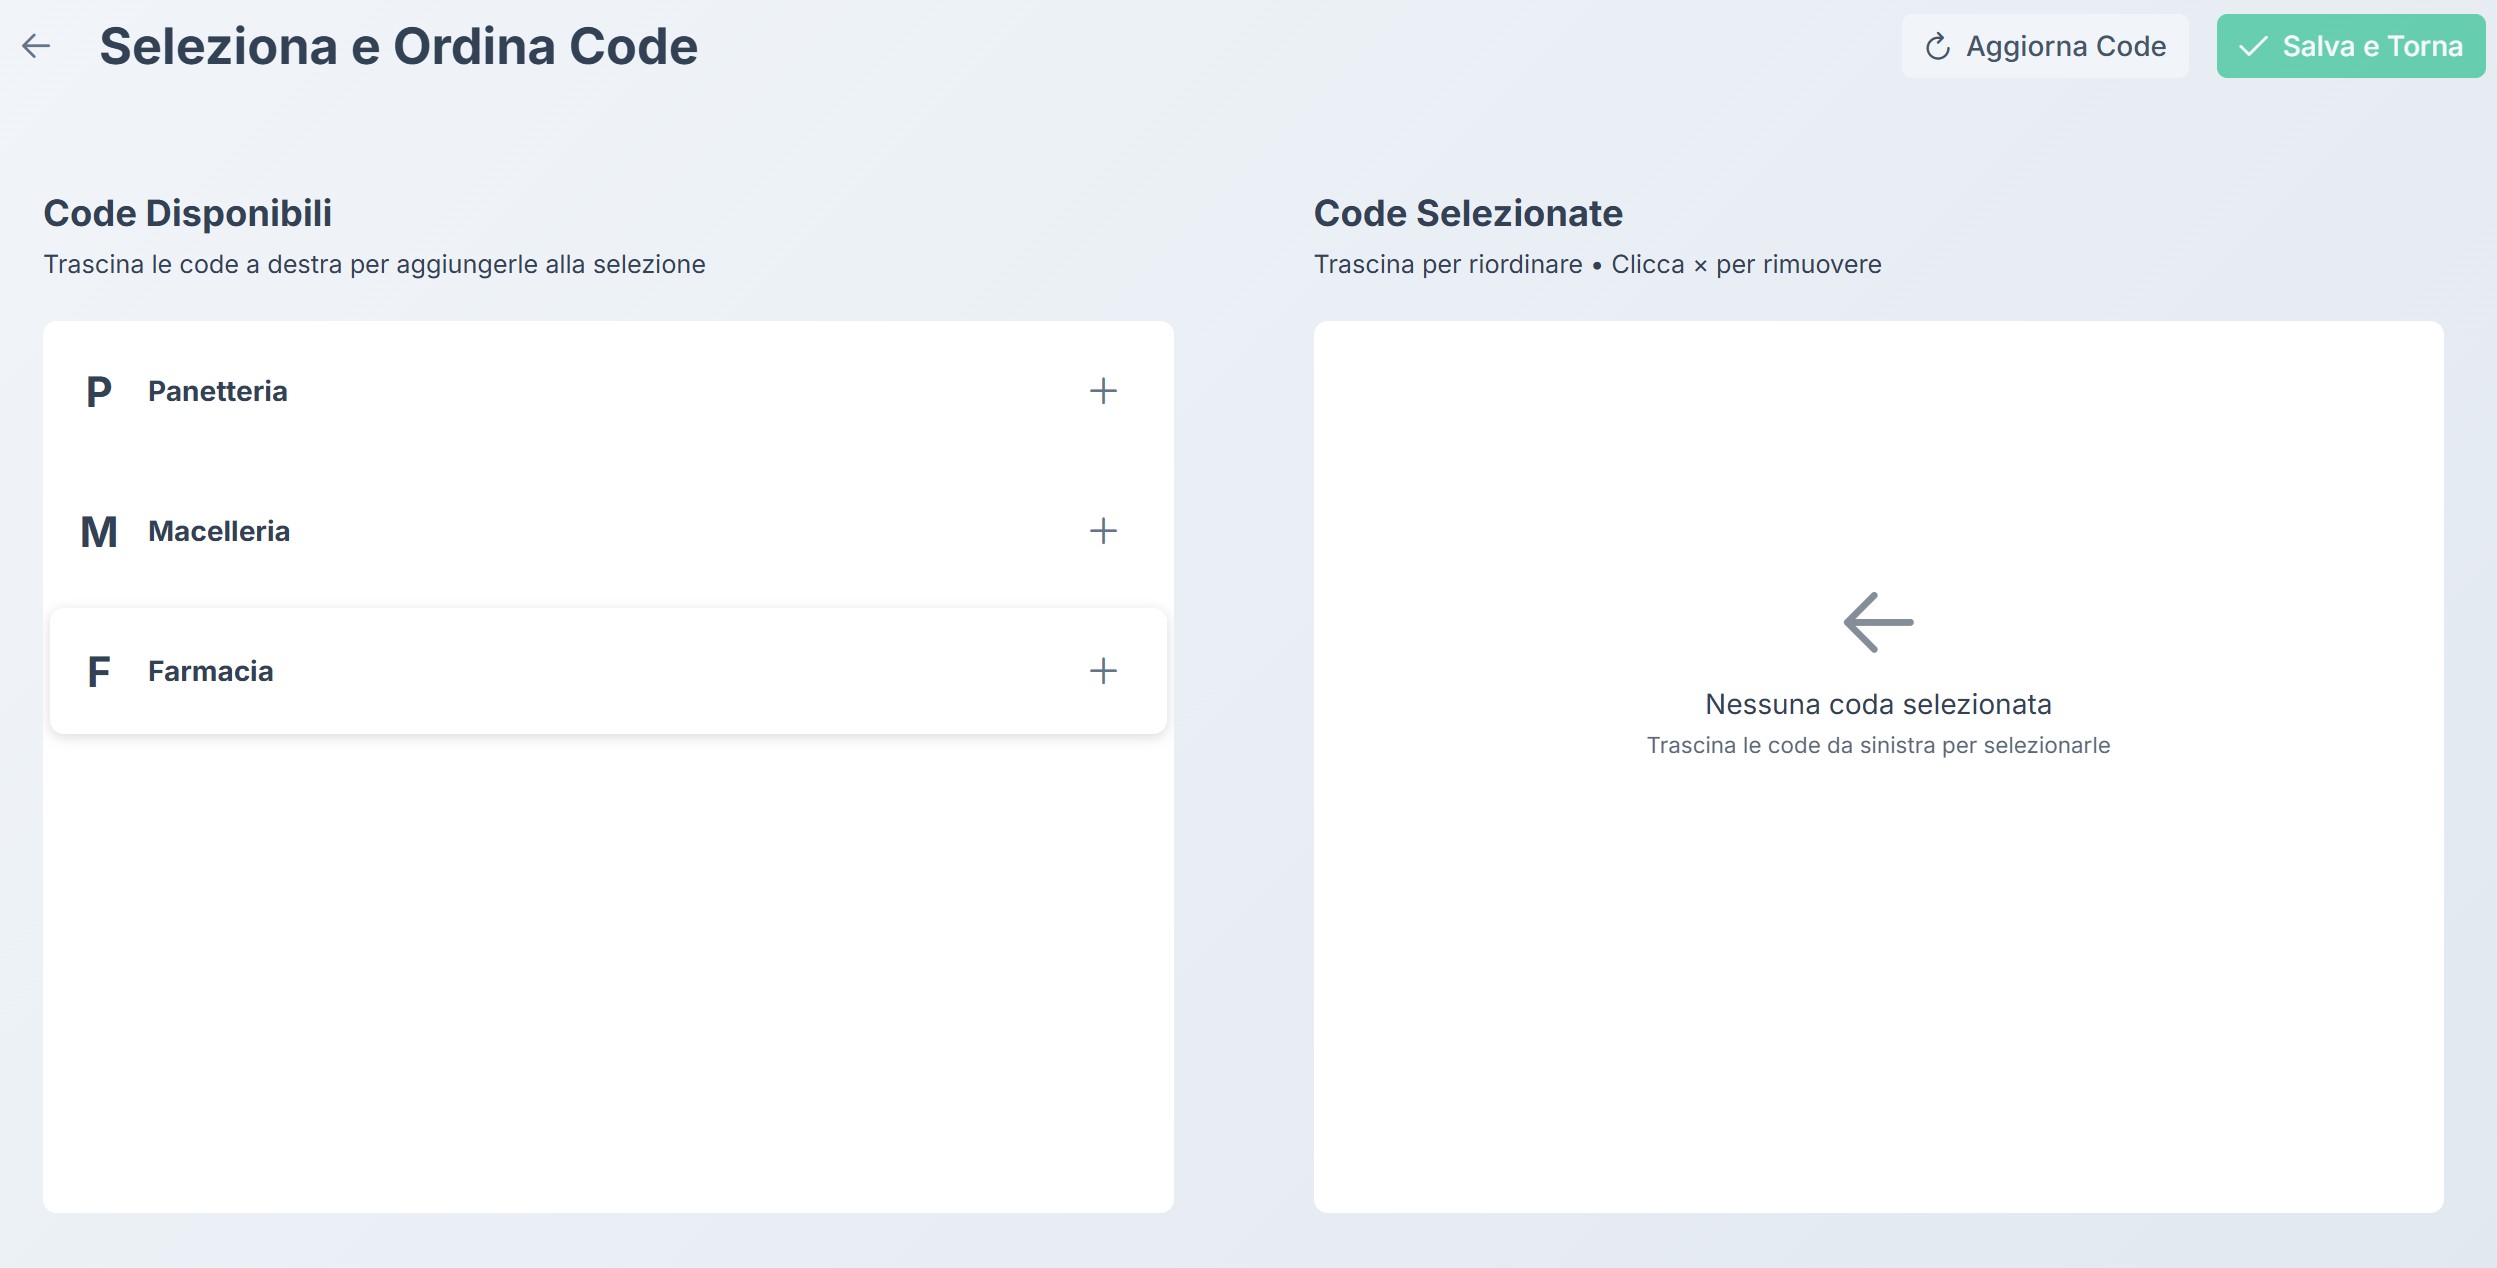
This screen is divided into two main areas.
Available Queues
The left side shows all available queues configured in Pharmadigital.
Each row represents a queue and shows:
- Queue code (e.g. P, M, F)
- Service name (e.g. Bakery, Butcher, Pharmacy)
To add a queue to the selection you can:
- press the + button
- or drag the queue to the right
Selected Queues
The right side shows the selected queues that will be displayed on the Controller's main screen.
You can:
- drag queues to change their order
- press × to remove a queue from the selection
The order of queues in this section determines the display order in the Controller grid.
Refresh Queues
The Refresh Queues button allows you to reload the list of available queues from the system.
This function is useful if new queues have been created in Pharmadigital.
Save and Return
After selecting the desired queues:
- press Save and Return
- the Controller will return to the main screen
- the selected queues will be shown in the management grid.
Operator Screen
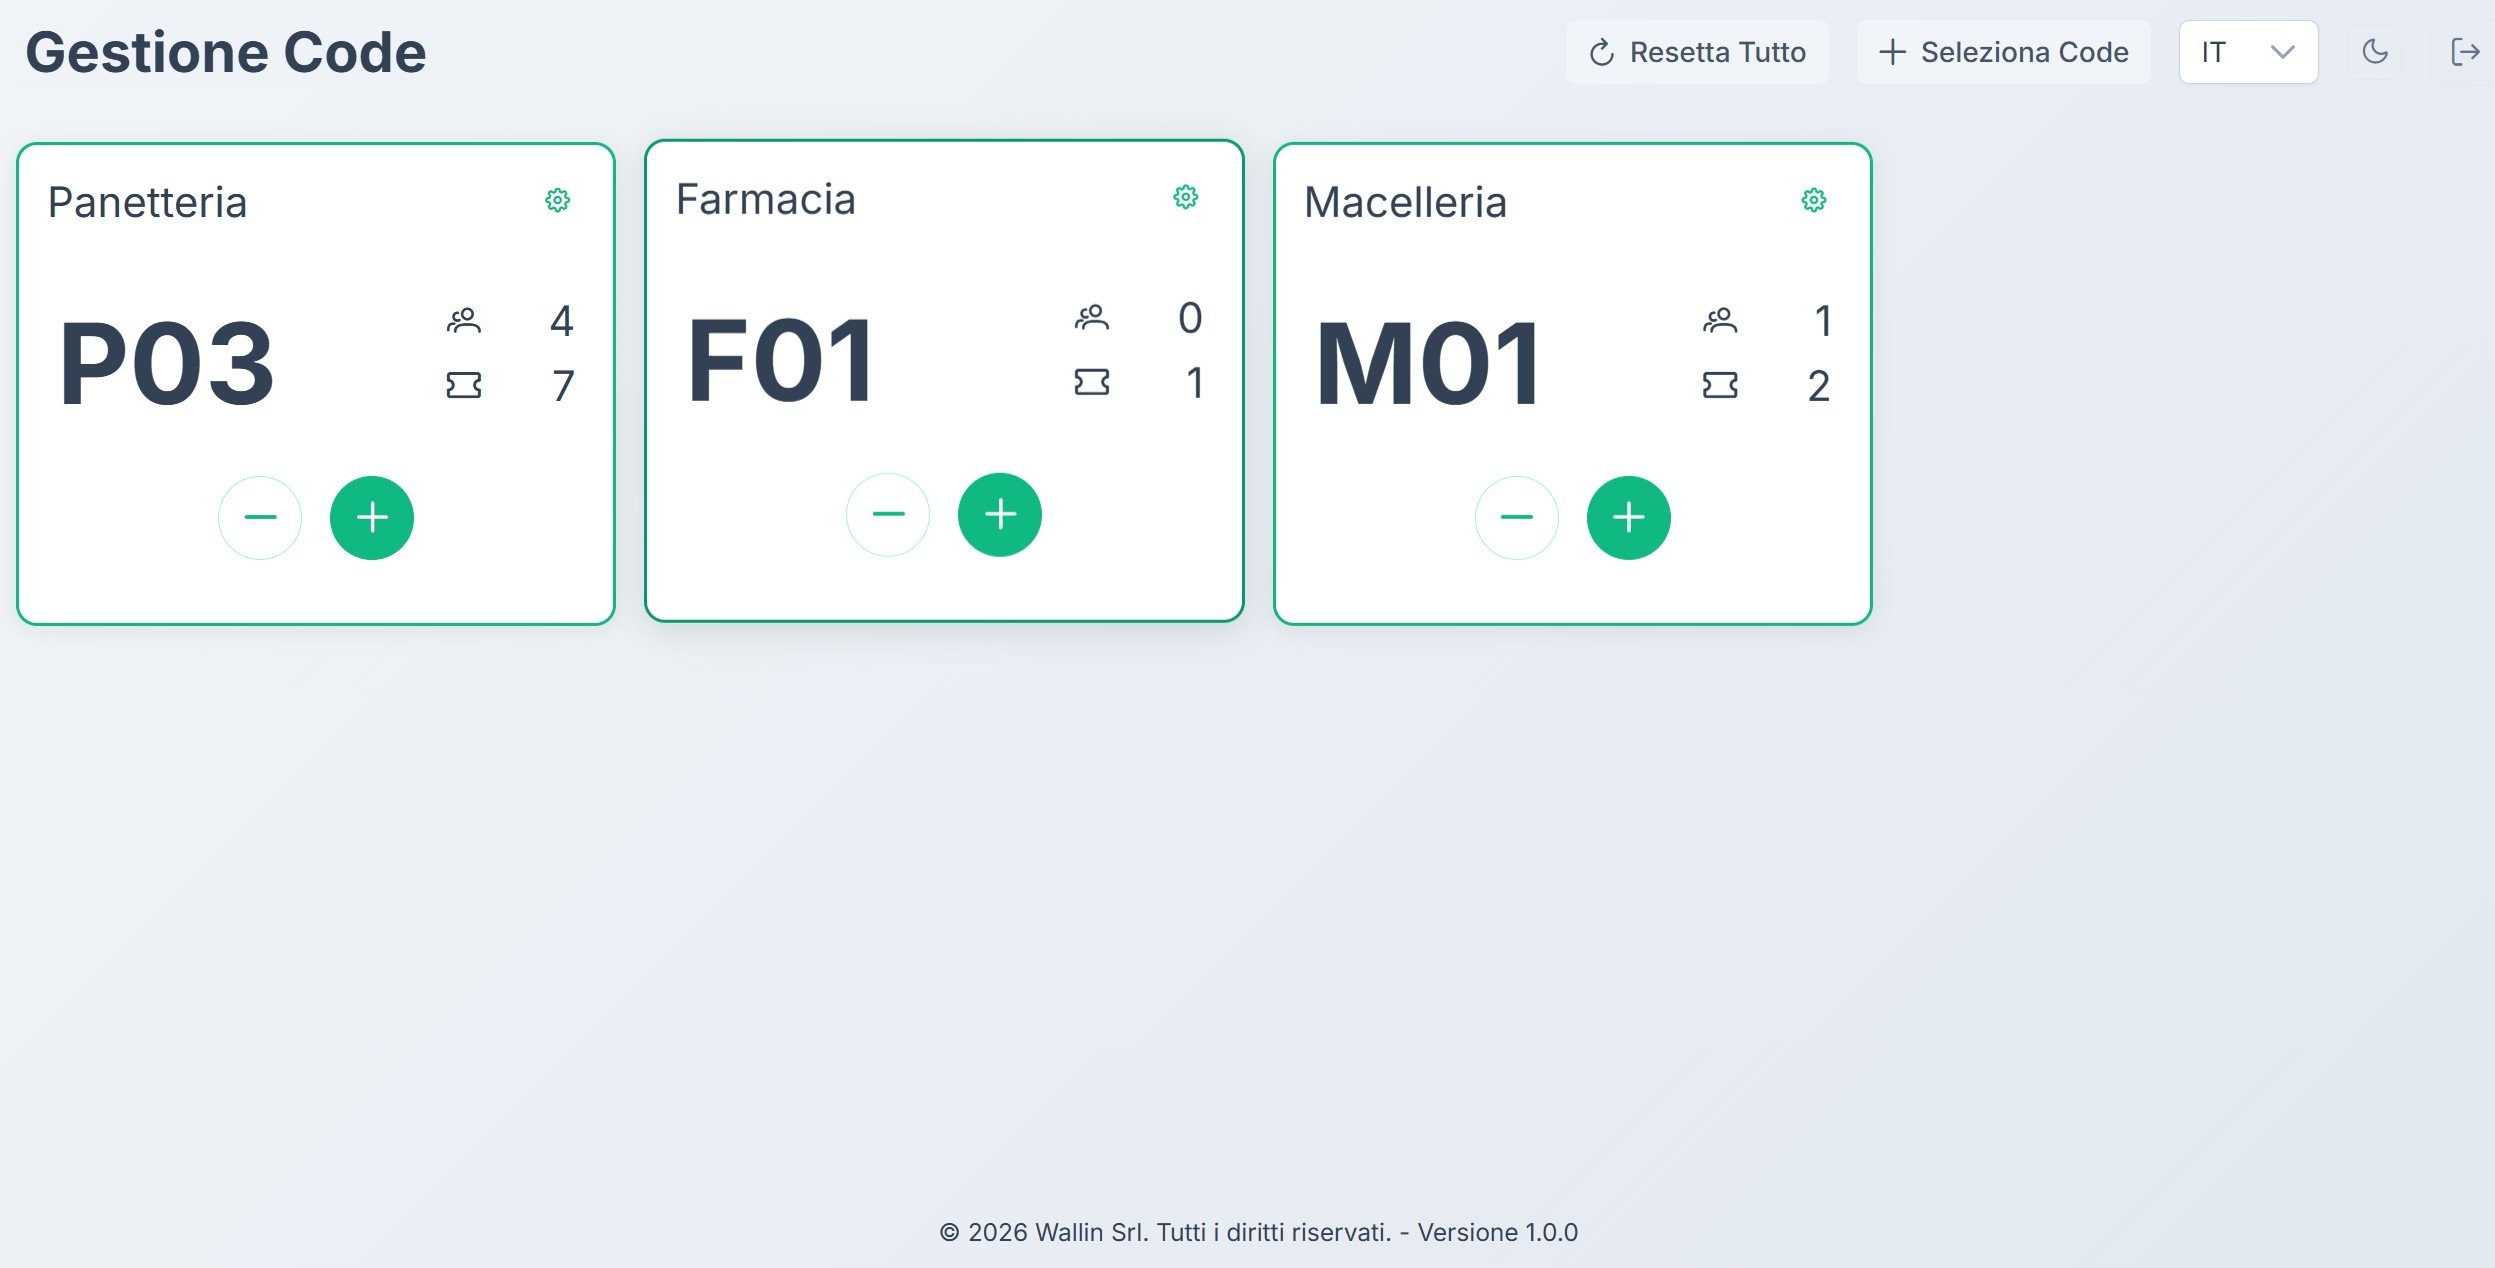
After selecting the queues, the Controller's main screen shows the operator panel, which allows you to manage and advance waiting tickets.
Each selected queue is displayed as an independent card.
Queue Card Structure
Each card represents a queue and contains the main operational information.
Service Name
The top of the card shows the service name (e.g. Bakery, Pharmacy, Butcher).
Current Number
The large number in the center represents the ticket currently being managed or just called.
Example:
P03
where:
- P is the queue prefix
- 03 is the ticket number.
People Waiting
The icon with people indicates the number of customers currently waiting in the queue.
Tickets Served
The ticket icon indicates the number of tickets already served.
Operator Controls
The bottom of the card contains the main controls.
Advance Ticket
The + button allows you to:
- call the next ticket
- advance the queue.
When pressed:
- the next number is called
- the number is shown on monitors via the Queue Management resource
- the ticket is marked as served.
Go Back
The − button allows you to go back to the previous ticket, in case it is necessary to correct an incorrectly advanced ticket.
Managing Multiple Queues
The Controller allows you to manage multiple queues simultaneously.
Each queue is shown in a separate card, allowing the operator to:
- monitor the status of each queue
- call the next ticket
- check the number of people waiting.
Queue Settings
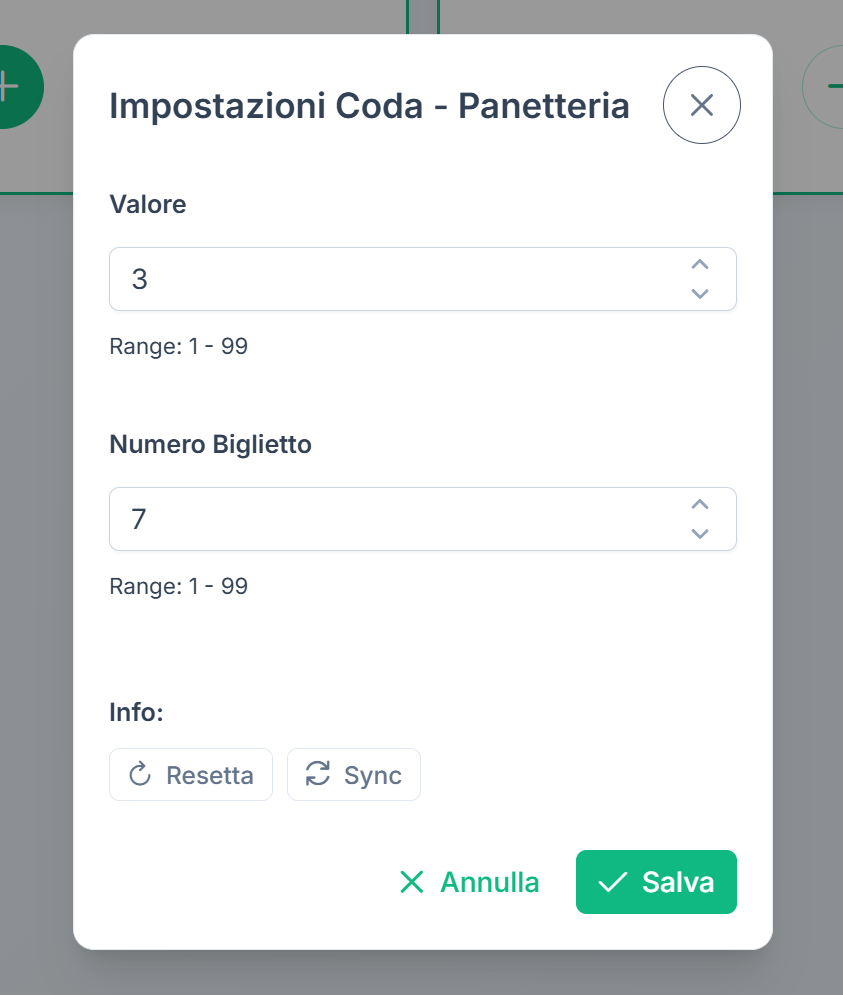
Pressing the ⚙️ settings icon on a queue card opens the Queue Settings window, which allows you to manually configure some operational parameters.
This function is useful for correcting or synchronizing the queue status during operations.
Value
The Value field represents the number currently called or being managed in the queue.
By modifying this value you can:
- manually correct the called number
- re-align the queue in case of operational error
- manually set the current ticket.
The value can be set in a range:
Range: 1 – 99
Ticket Number
The Ticket Number field represents the last ticket issued by the system.
This value indicates the highest sequential number assigned to queue tickets.
This field can also be modified manually to:
- correct synchronization errors
- re-align the ticket counter.
The value can be set in a range:
Range: 1 – 99
Available Actions
Reset
The Reset button restores the queue values to their initial state.
This operation can be used, for example, at the start of a new working day.
Sync
The Sync button synchronizes the queue state with the central system.
This function is useful when the Controller and connected devices need to re-align queue data.
Saving Changes
To confirm the changes:
- press Save
- the new values will be immediately applied to the queue.
To cancel the changes, press Cancel or close the window.
Questions?
For additional support, open a ticket.Last updated: May 2026